Wednesday, August 19, 2015

Second Degree Burn Healing Progress

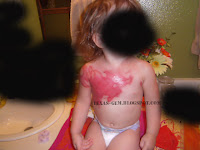
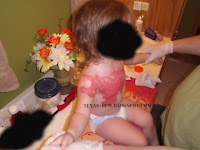
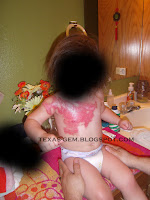
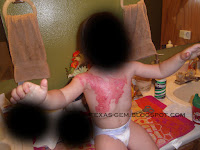
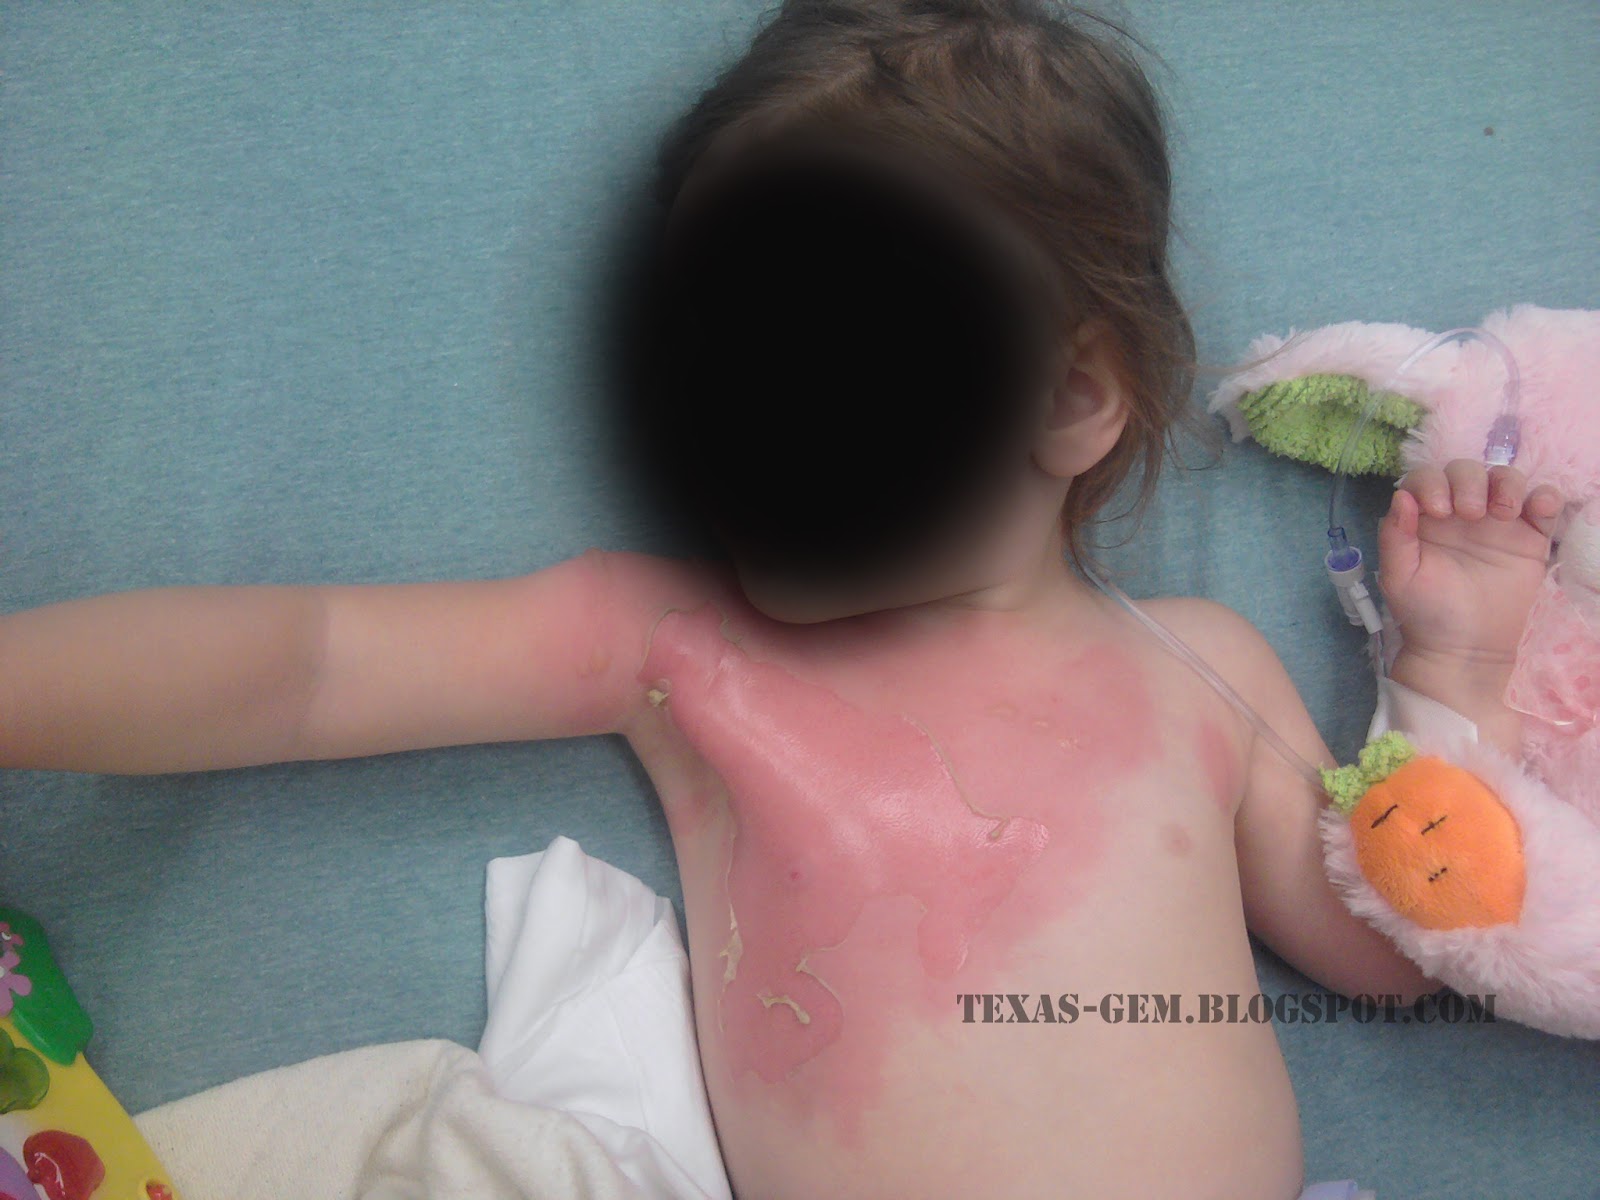
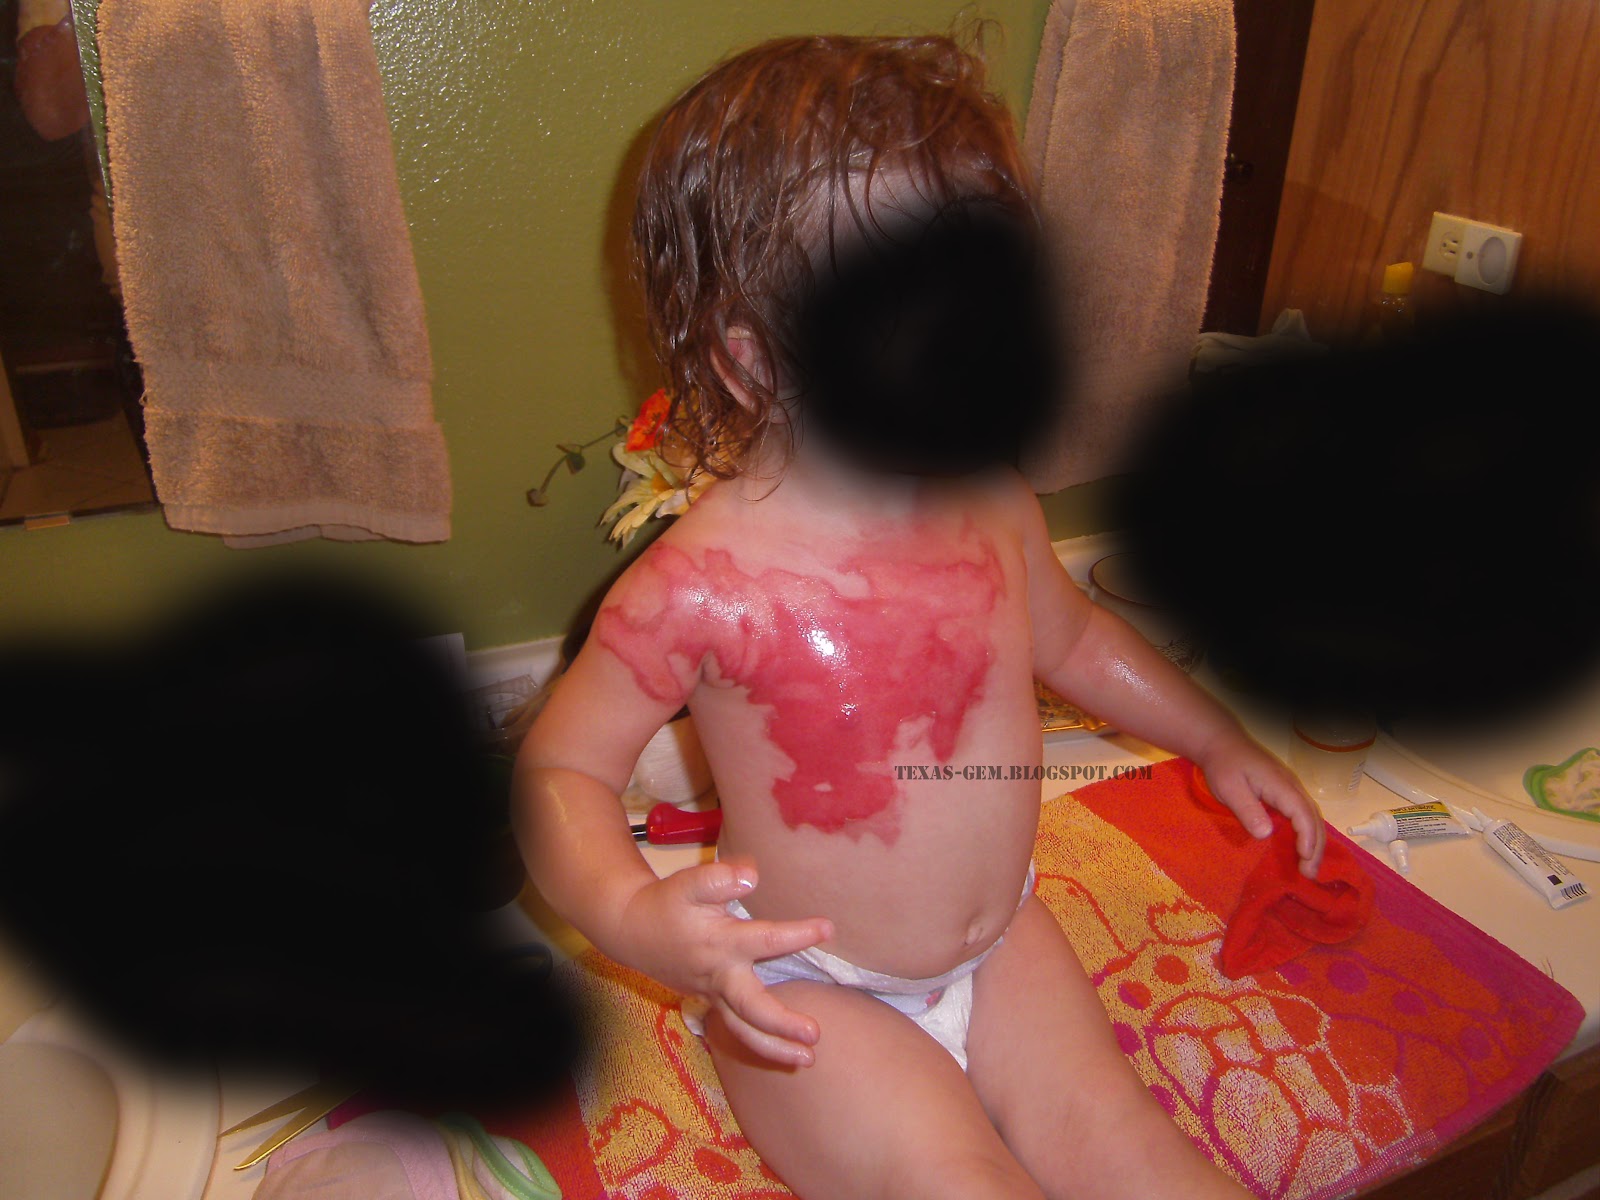
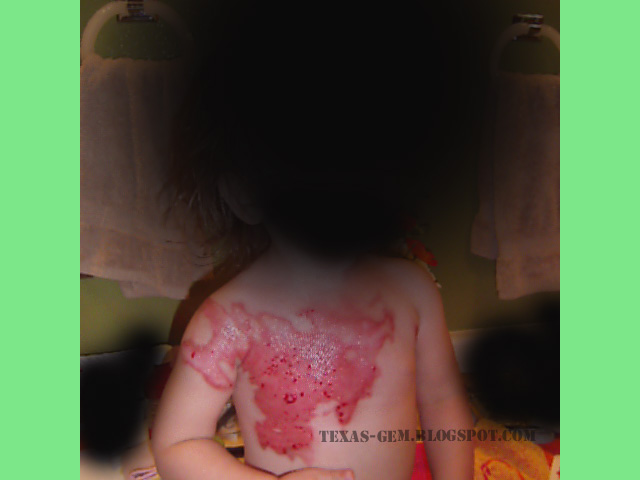
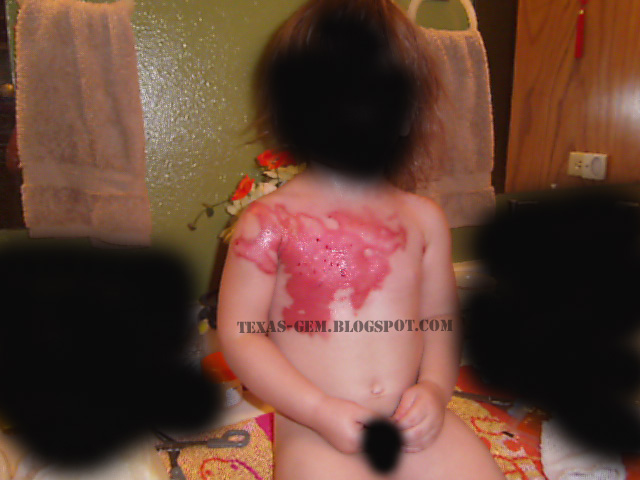
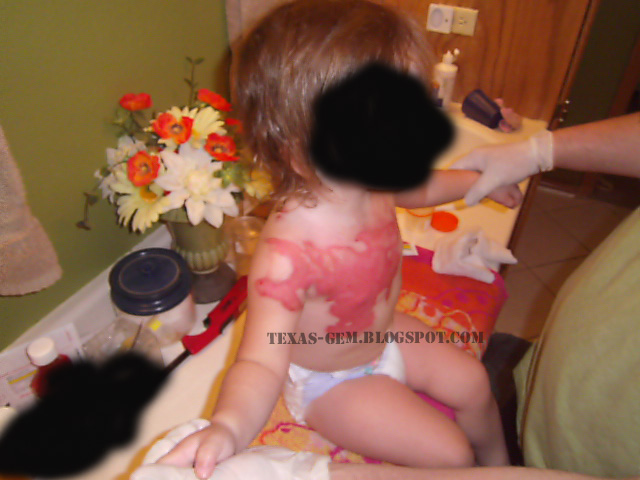
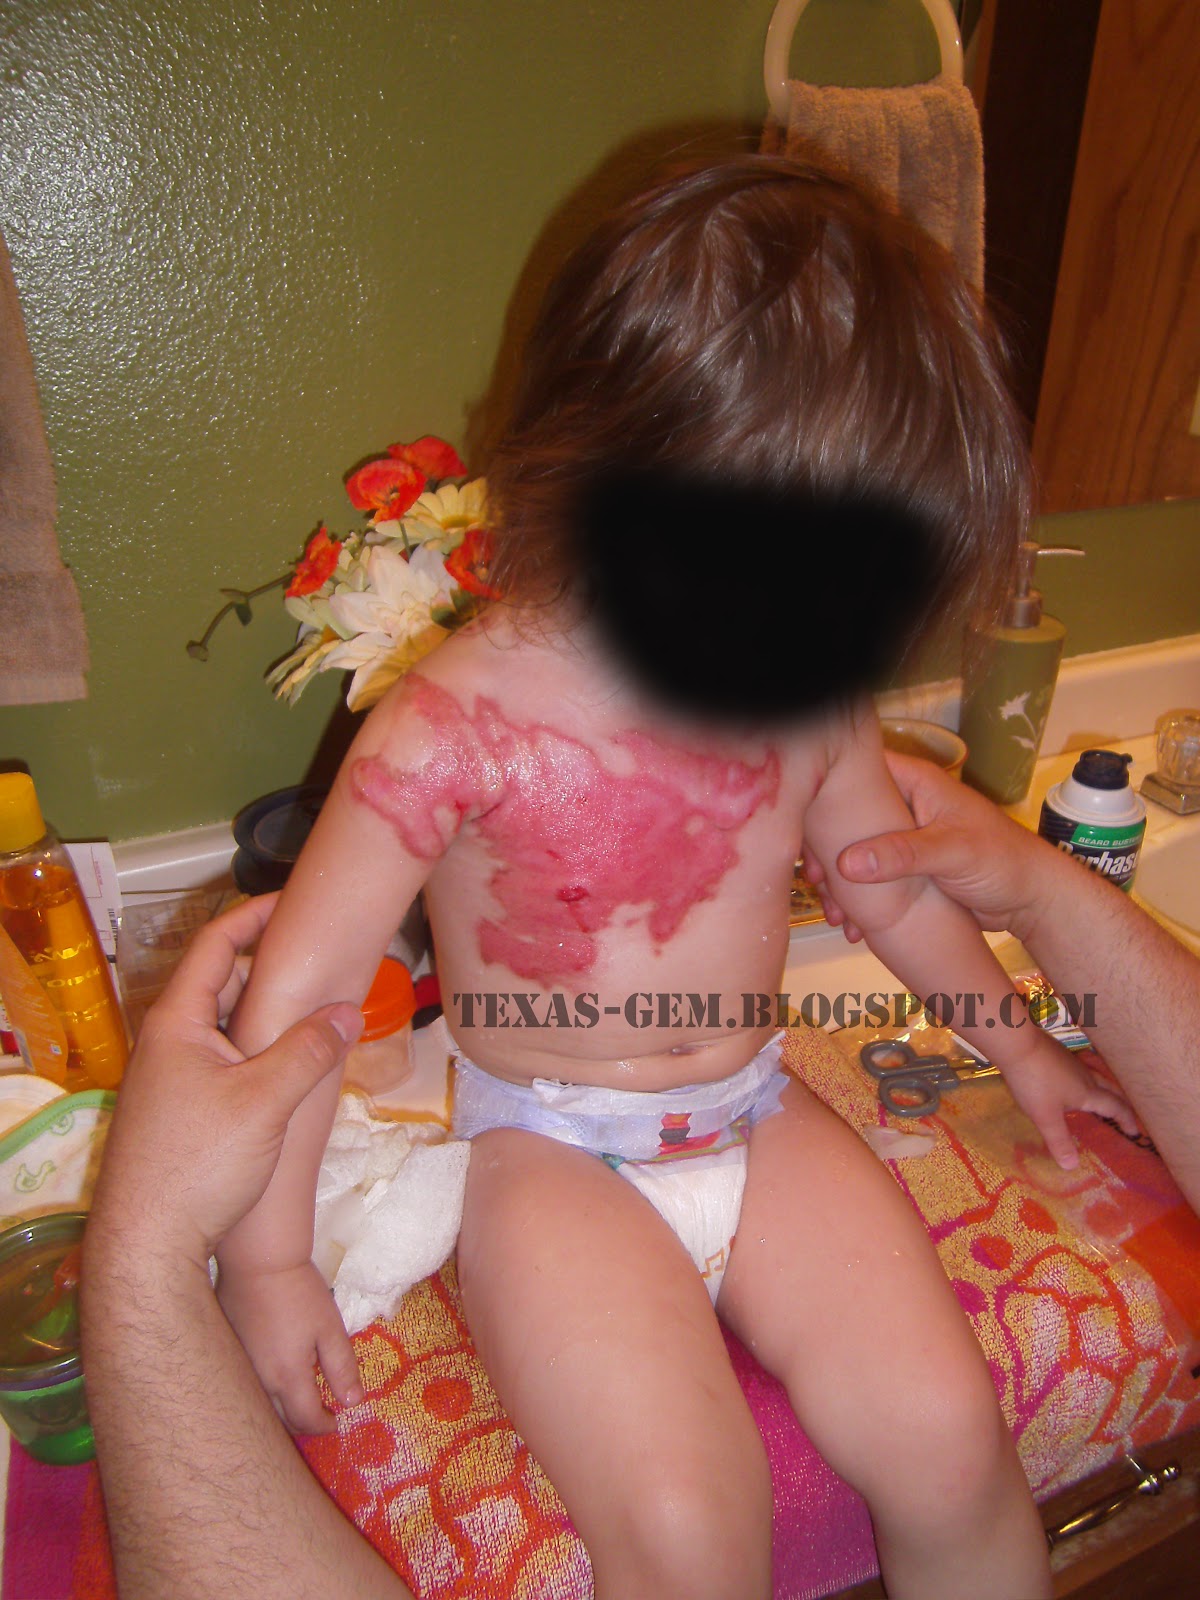
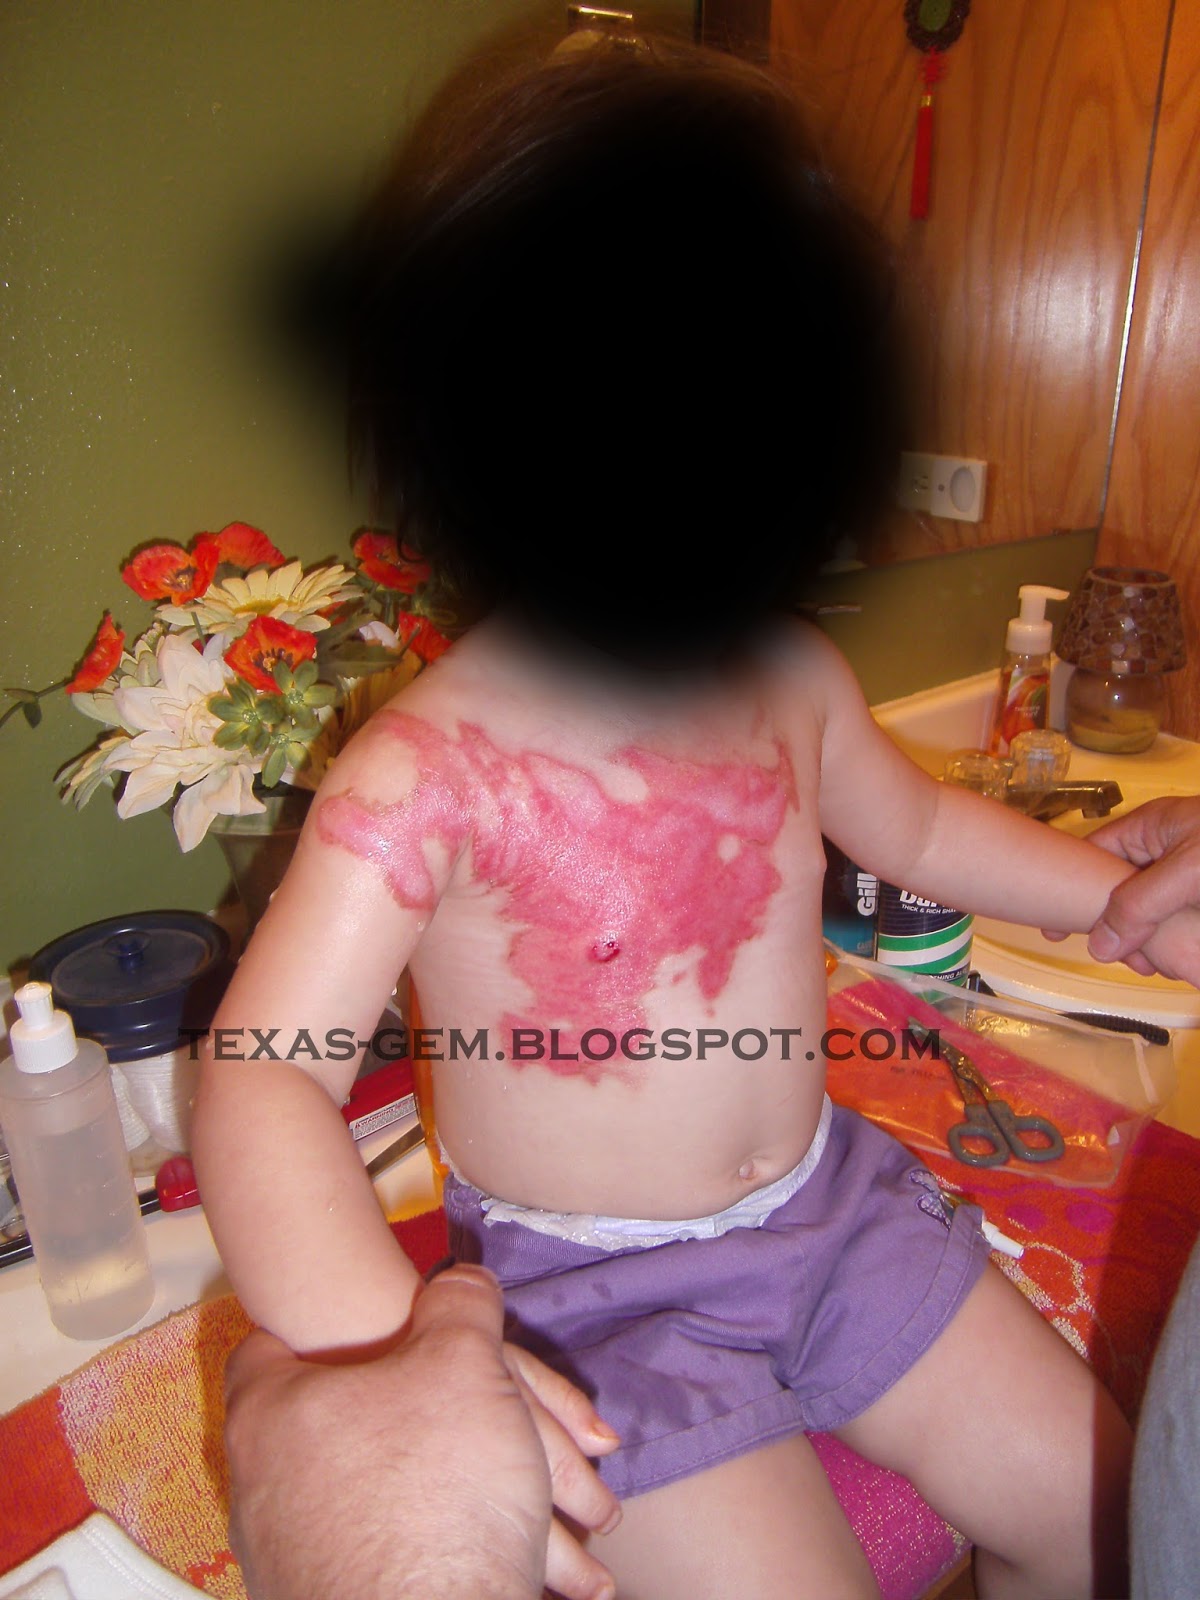
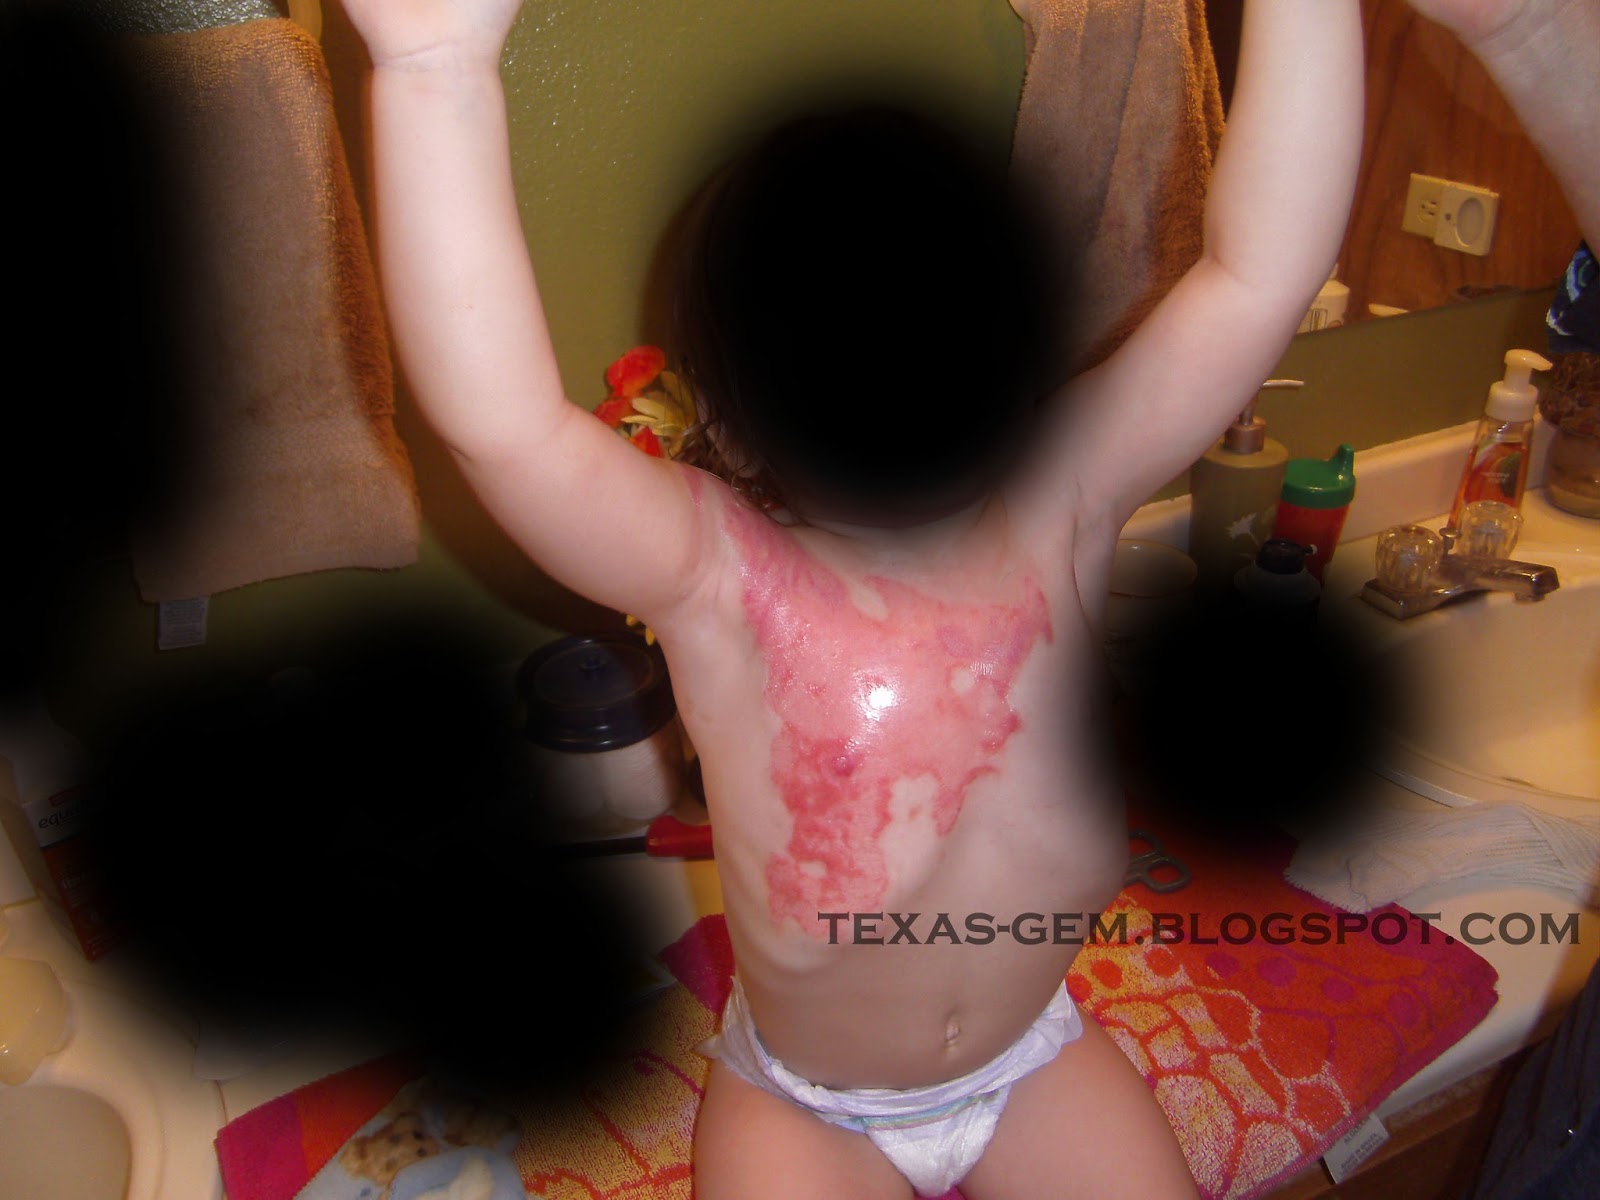
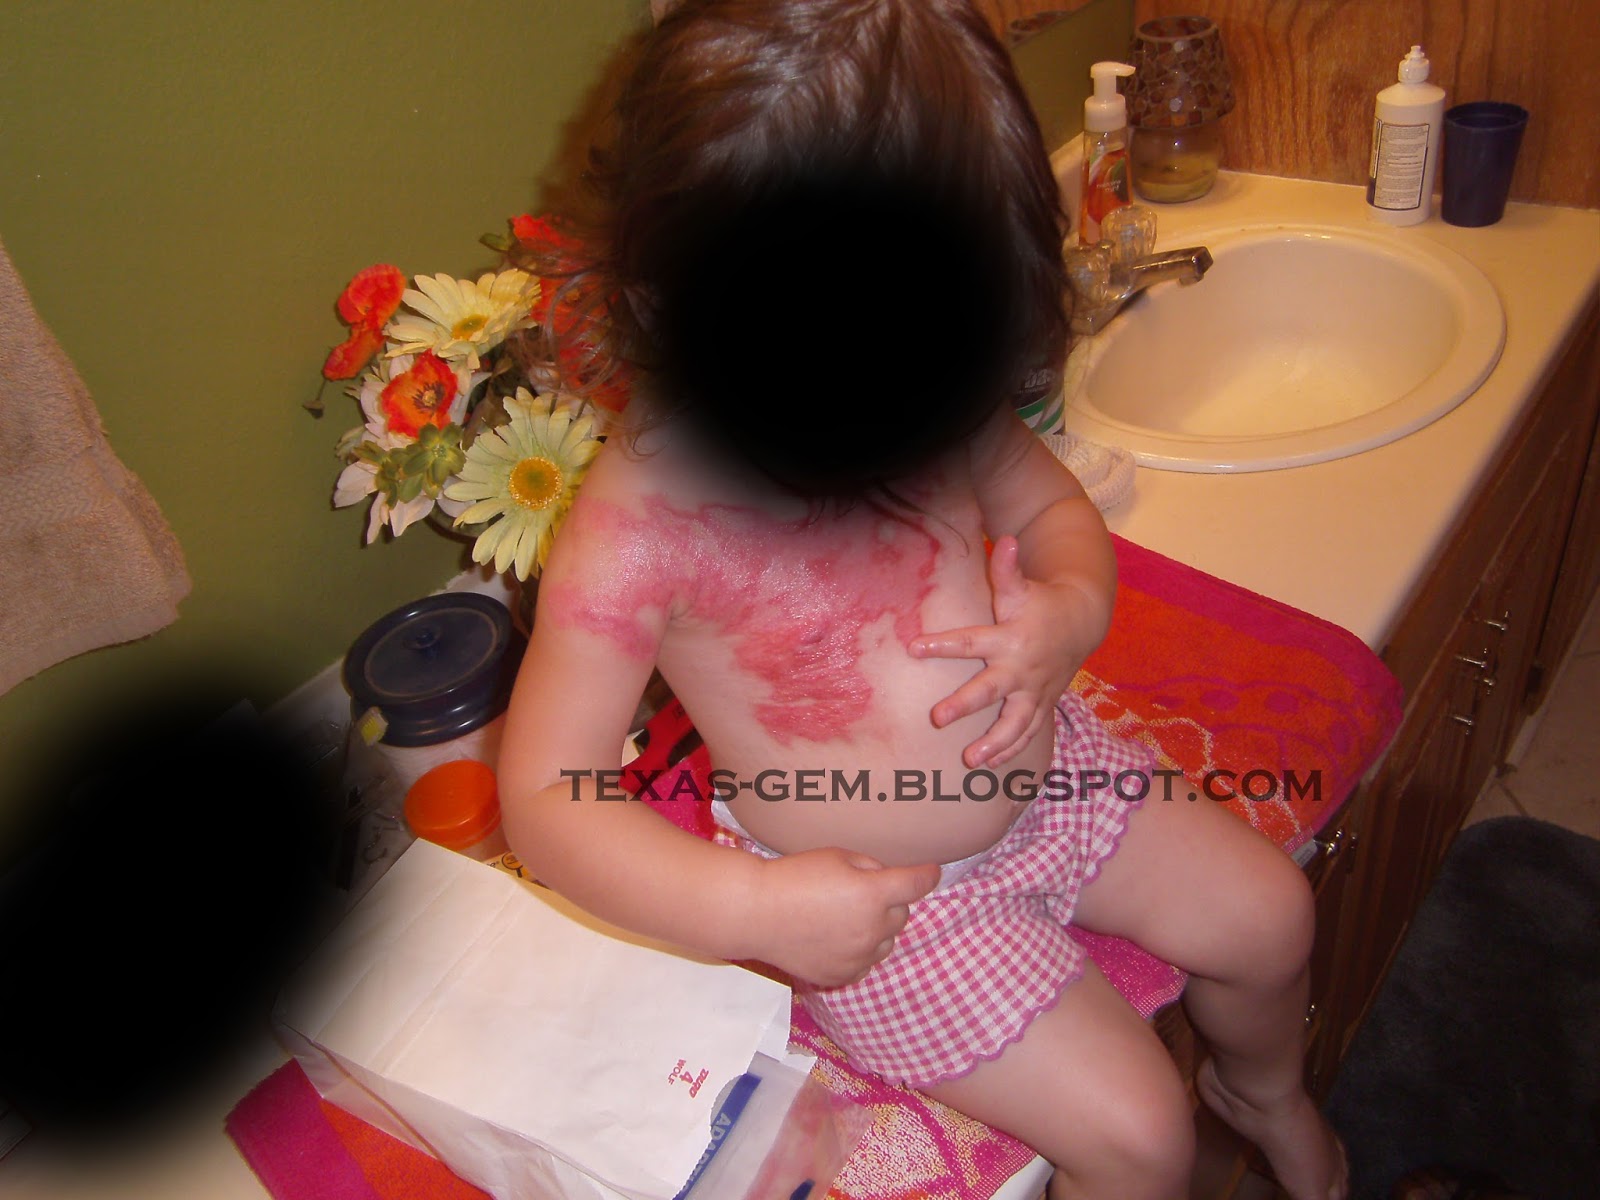
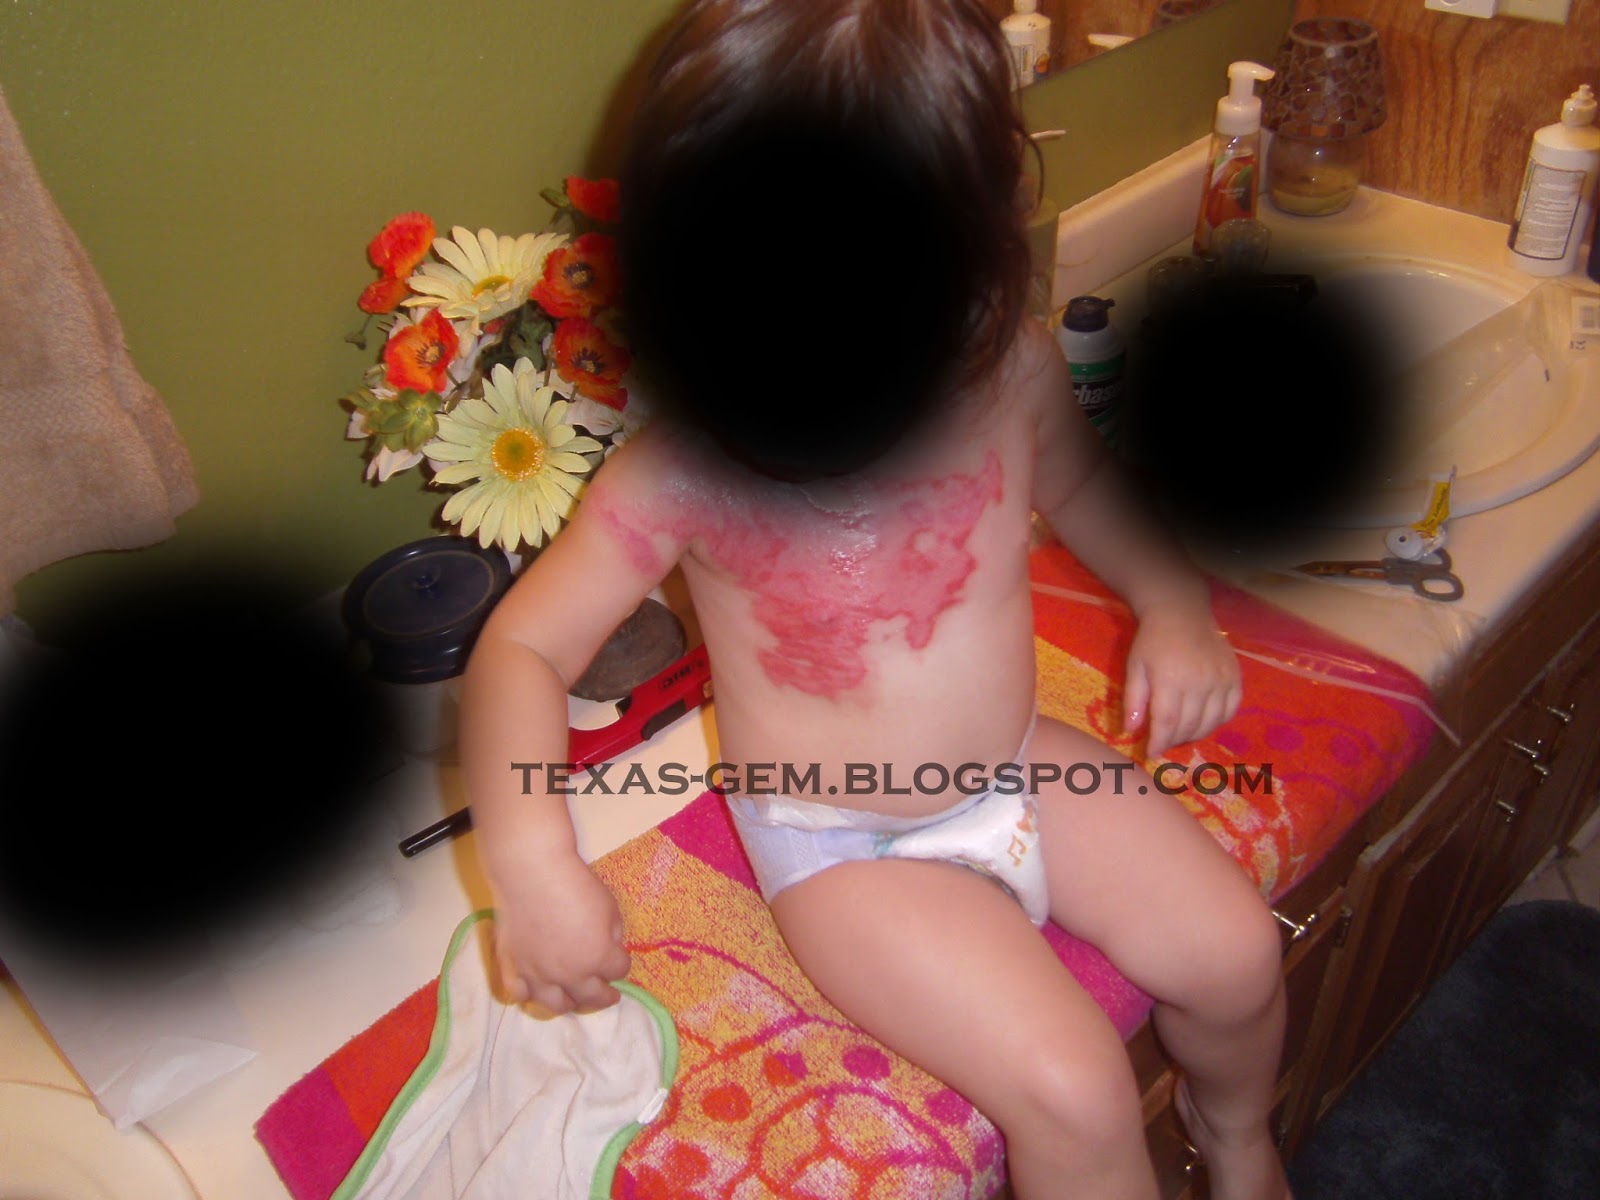
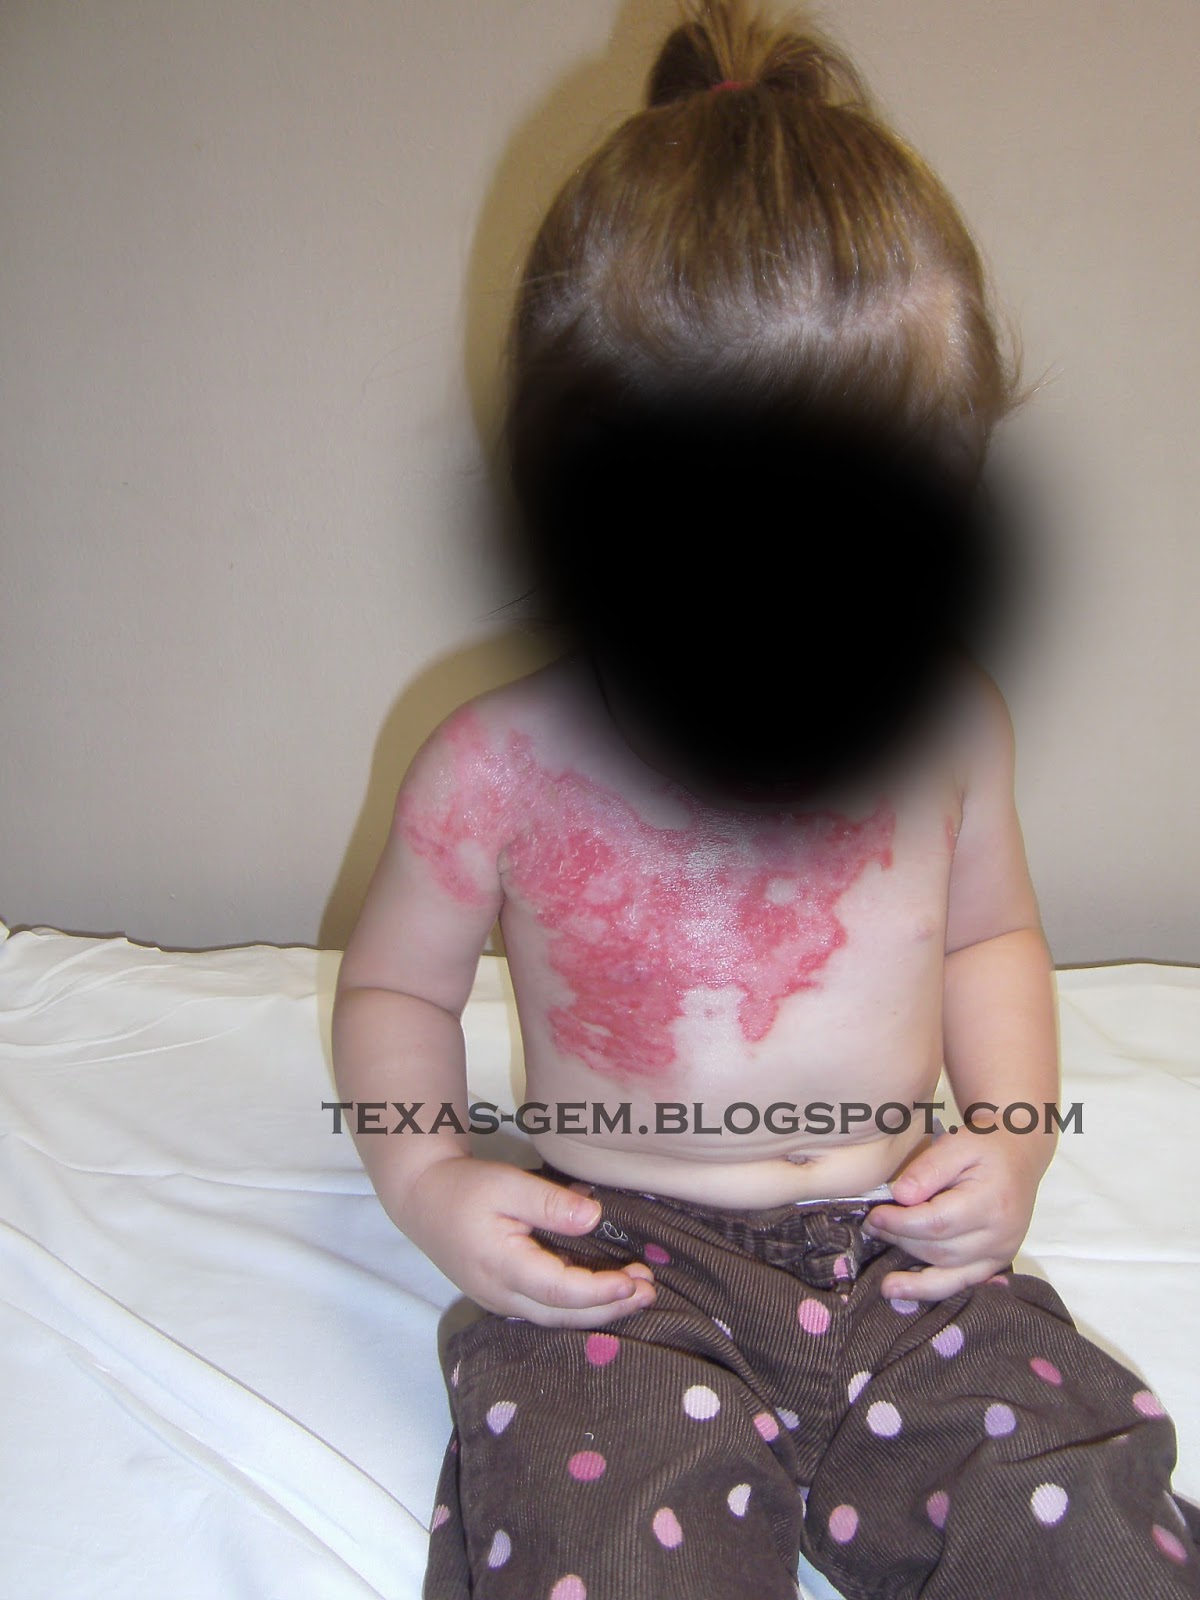
After much deliberation, I have decided to post the daily pictures I took of my Monster when she was healing from her superficial second degree scald burns in the hopes that it may help other parents facing the same thing to have an idea of what to expect in regards to what it looks like as it heals.

In 2011, my Monster, who had recently turned 2, pulled a bowl of stew off the counter onto herself right in front of me.  I couldn't stop her.  It was like a horror movie taking place right before my eyes.  I had just ladled the boiling stew into bowls and pushed them to the back of the counter where (I thought) my kids couldn't reach them to cool off.  While they were cooling, I started unloading the dryer a few feet away.  I saw my Monster approach the bowls, told her to stay away because it was hot, saw her reach for it, started towards her but was not fast enough.  In the blink of an eye, she had pulled a bowl of stew off the counter onto herself.  I instantly pulled her clothes off and a layer of skin came with it.  I rushed to the bathroom and turned the cold water on, putting her into the tub where she immediately laid down on her stomach in the cold water, trying to stop the pain.  As I wrapped her in a towel and started rushing towards the phone to call Mr. Gem, he pulled up.  I yelled at him to put her car seat in his car.  Within minutes he had her in the car and he was racing for the hospital, which is about 30 minutes away.  He made it in 8 minutes.  I turned off the appliances so the house wouldn't burn down, loaded up my Monkey, called my parents and started towards their house to drop off Monkey so I could go to the ER.


In the ER- you can see where the initial skin came off as I pulled her clothes off
When I was a block from the ER, Mr. Gem called to tell me she was being airlifted to the specialized burn unit 2 hours away.  I got to the hospital in time to see her for a few minutes before she was loaded on the helicopter.  Because of the flying conditions, Mr. Gem and myself were not able to fly with her.  I had to stand and watch while my terrified 2 year old was doped up on morphine and loaded into a helicopter with strangers.
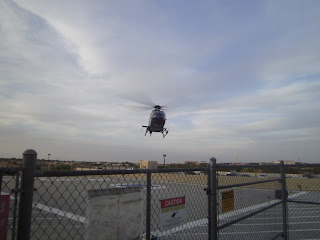
Watching the helicopter take off with my baby

We waited long enough to watch the helicopter take off and then Mr. Gem and I rushed home, packed overnight bags for ourselves (did I mention I was 38 weeks pregnant with Bear at the time?!?!) and took off towards the hospital she was lifted too.  After about an hour on the road, we called the hospital to make sure the helicopter had landed safely.  We were assured that yes, it had landed, she was safe and they had someone sitting with our daughter until we arrived.  We were pulled over by a State Trooper on the way.  We explained why we were speeding and the Trooper was very gracious to let us go with a warning.

We got to the hospital and were promptly taken back to our daughter.  She was kind of out of it because of the morphine but was still in obvious pain.  We cuddled with her and tried to take her mind off of it until the doctor came in and explained that they were going to have to debride the wound which means they had to essentially use a Brillo pad to scrub all the blisters and dead skin off of her wound and then apply medicine.  They gave her another shot of morphine, waited for it to kick in and then we were escorted to the other side of the ER.  We were told that even with the morphine shot, it would be painful and it was easier if we weren't right there.  Even through all the closed doors, we could hear her screams of pain.

As soon as they were done debriding her wound and bandaging her, they came and got us.  She was transferred to the pediatrics unit and my husband was allowed to stay the night with her while I got a hotel with my father, who apparently followed us and arrived shortly after we did.
They monitored her vitals and kept her on IV fluids to insure she wouldn't go into shock and the next morning, the burn specialist came in, checked our daughters wound during a bandage change, informed us that it appeared she had superficial second degree burns and told us she didn't look like she would need skin grafts.
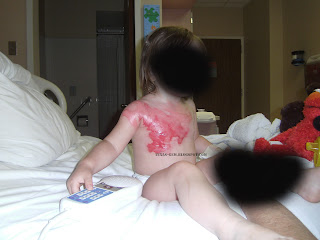
First bandage change after initial debridement, she was NOT happy

We were given instructions for changing her bandages at home, prescriptions for pain medication and the wound care supplies and she was released with instructions to debride the wound once or twice a day, put Neosporin on it covered with a nonstick adaptic dressing, covered with gauze and held in place with a mesh net.
 

1st bandage change at home- after bandages come off

1st bandage change- after debridement

2nd bandage change- after bandage removal
2nd bandage change- after scrub

3rd bandage change- after bandage removal

3rd bandage change- after scrub

4th bandage change- after bandage removal

4th bandage change- after scrub


5th bandage change- after bandage removal
5th bandage change- after scrub


6th bandage change- after removal


6th bandage change- after scrub


7th bandage change


8th bandage change- after bandage removal


9th bandage change- after bandage removal
9th bandage change- after scrub


You can see the area under her nipple is starting to look more irritated.


10th bandage change- starting to itch
10th bandage change- after scrub


At this point it had been one week since we left the hospital and they wanted us to come back for a check-up.  She was NOT a happy camper while we were there!  They said that she was having a reaction to the Neosporin.  We were told to switch to Aquaphor and continue with the bandages until the wound was no longer oozing.  We also found out that she had 3 small spots where the burn underwent conversion to a deeper second degree burn but they were small enough to not require grafts.

This post is getting long so I'm going to break it into two parts.  I'll post the rest tomorrow.
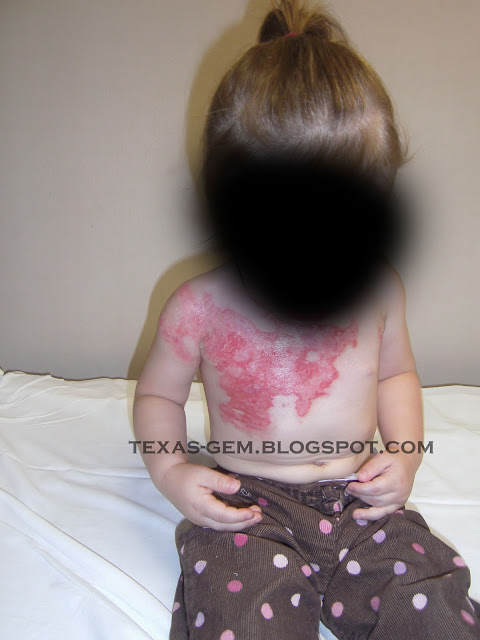

ONE WEEK CHECK-UP


Wednesday, August 5, 2015

Long Time, No see

Well hey there friend!! Did ya miss me?  Did ya even notice I was gone?  Do you even know who I am?!? ;)

For those 2 people who have actually read my blog and have been waiting with bated breath for my newest post; I apologize.

I didn't mean to run off and leave you on the edge of your seat as to what brilliant project or recipe Texas Gem might post next!!

You see....life happened.  I had a post I was working on which required a lot of effort and then, kids and life happened.  I forgot about my blog and went on living life.

Since my last post I've had another child, remodeled my home extensively, hit a milestone birthday and had 2 kids start school.

I was recently reminded of just how much I miss my blog so here I am!!

Expect a post in a few days, the one I started working on 3 years ago which is still saved in my drafts.

After that will come new recipes and how to remodel your house into a mansion on a shoestring budget!!

Thursday, April 19, 2012

My Oldest Best Friend Died

June 26, 1996- April 18, 2012

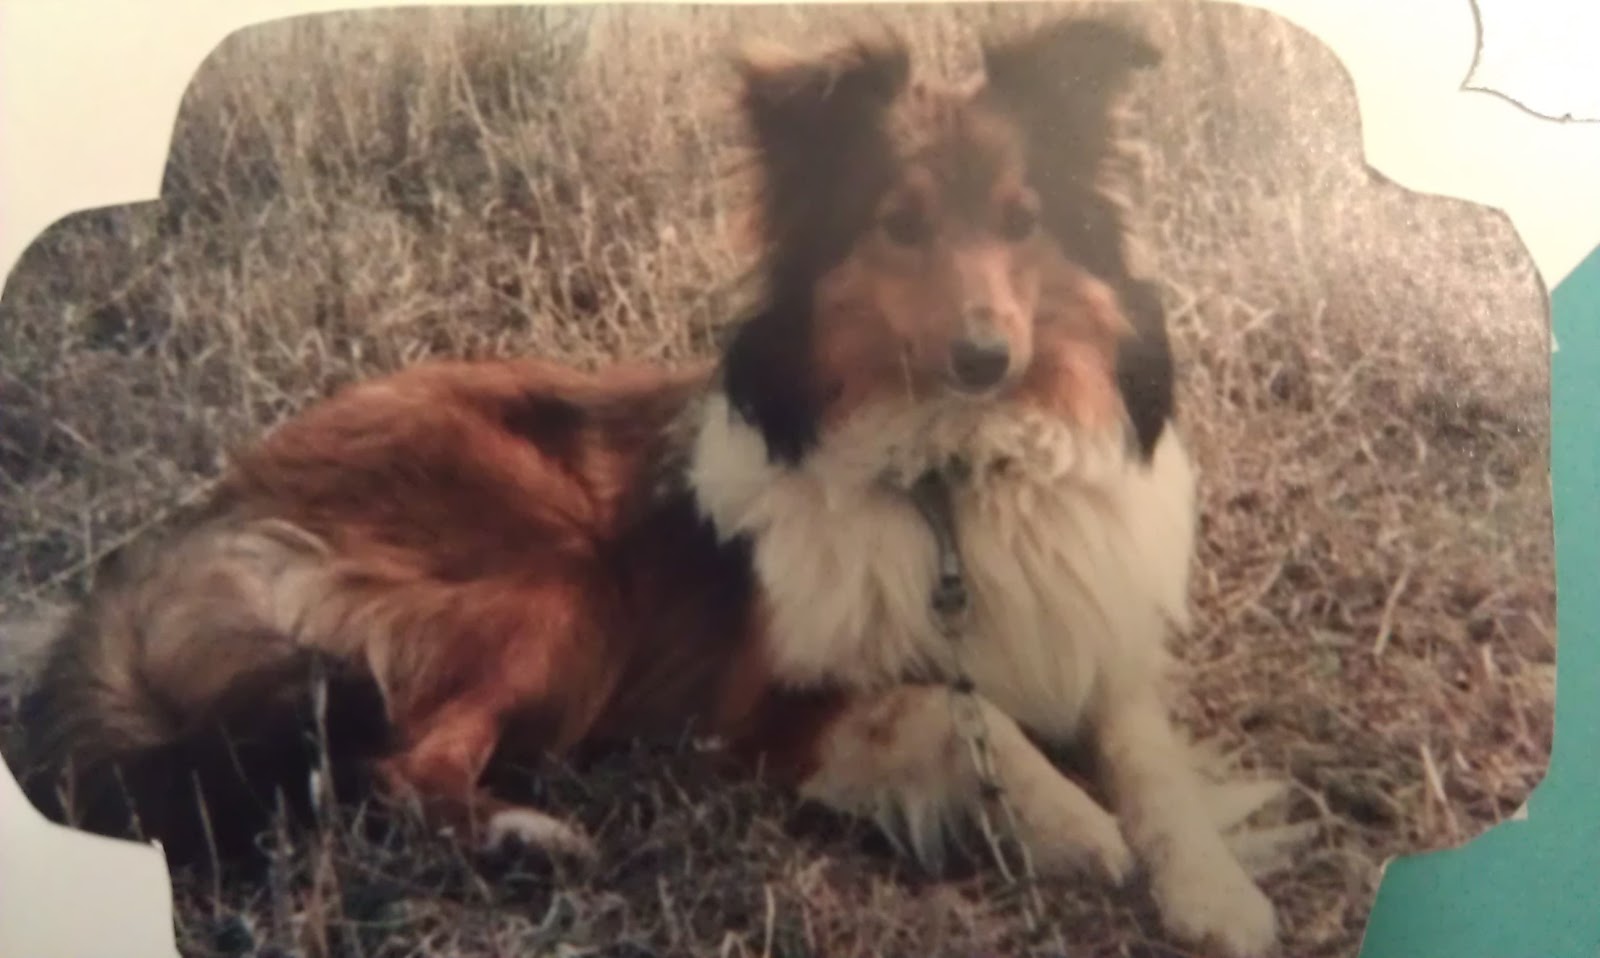
Honey Bunny.  My beloved best friend, the dog that saw me through the tumultuous teenage years, numerous surgeries, marriage, 3 children, buying my first house and moving to my forever home, you have moved on to your forever home in heaven after 16 wonderful years. 
Honey Bunny, I love you and I will miss you but I will always cherish all of the good memories I have of you.  The way you would wait for me to get home, the torturous 6 months when I moved out and I couldn't take you with me and you were depressed, constantly pacing and waiting at my bedroom door for me, the way you curled up on the bed next to me and if I wasn't there, you would find the one piece of clothing that smelled like me and lay on that until I was available, the way you always followed me and wanted to be right next to me, protecting me even to the end, we grew up together. 
In many ways it is a cruel world that dictates that our natural lifespans are so drastically different and yet, I wouldn't change the last 16 years for the world.  I am so proud to have been your mommy and for you to be my fur baby.  You were always there for me and I am proud to say that I was always there for you.  I didn't give up on you, even at the end when you were incontinent and you couldn't stand to eat very well because of your arthritis.  I stood there and held you up while you ate your dinner, I put doggie diapers on you so you could stay inside where you belonged.  I cuddled and pet you every night; even after the whole household was asleep, I wouldn't go to bed without checking on you to make sure you were comfortable and had what you needed.
To my best friend, I am so happy to have had you in my life and I hope you were happy to have me.  I love you and I miss you already.
1997- you were just starting to become an adult


After a haircut

Friday, February 17, 2012

Indoor Campout

If you have never had  an indoor camp out, I highly recommend it!  I decided to have  an impromptu camping trip for my daughters and it was truly a huge success.  So here are the 5 easy steps to your own indoor camp out.

1. Create a tent.  If you don't have a tent or have one but don't want to bother getting it out and setting it up, you move all your kids furniture to the side in their room.  Take a large sheet and drape it over the backs of dining room chairs, using rubber bands to tie on.  Take a comforter or large blanket and spread it out underneath the tent with pillows.


2. Make sure your kids are properly packed for their camping trip, in our case the essentials were a stuffed animal, a book and a pair of  pajamas.  You notice that they already put their backpacks in their tent.
 
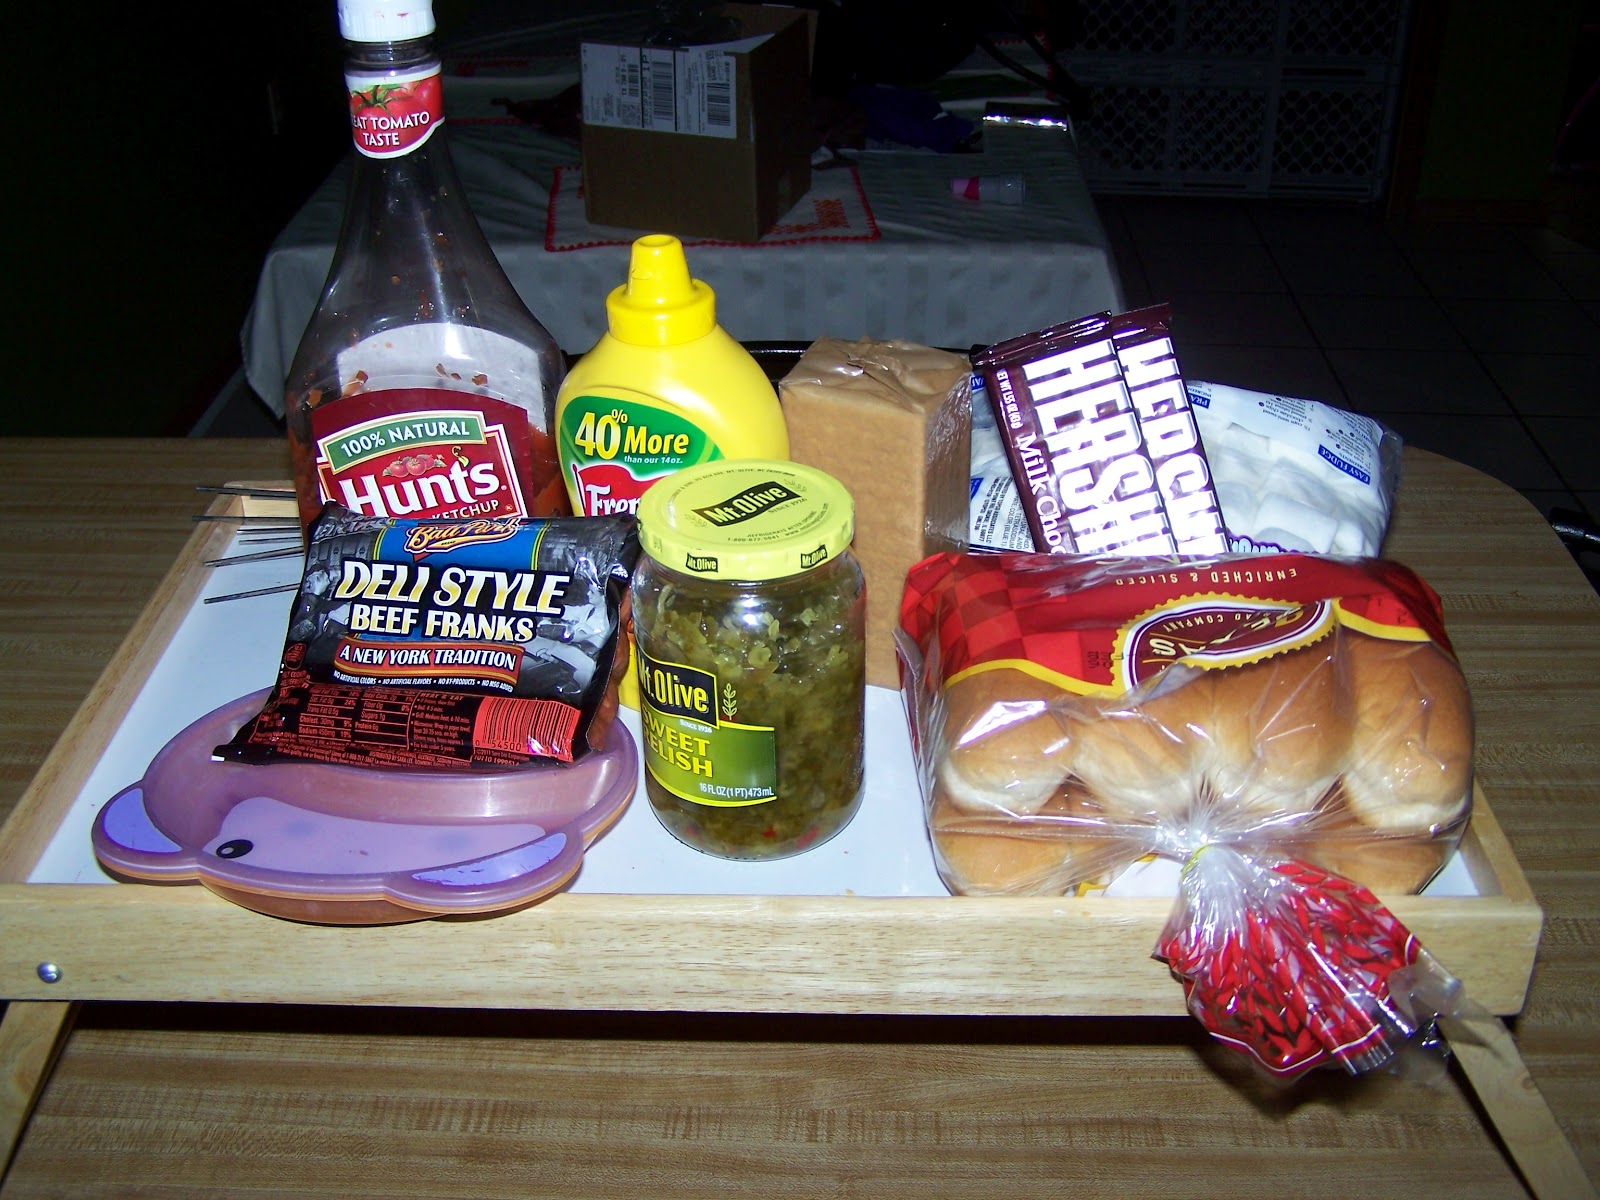
3. Gather all the required nutritional items which of course means hot dogs, hot dog buns, ketchup, mustard, relish, graham crackers, marshmallows and chocolate bars.


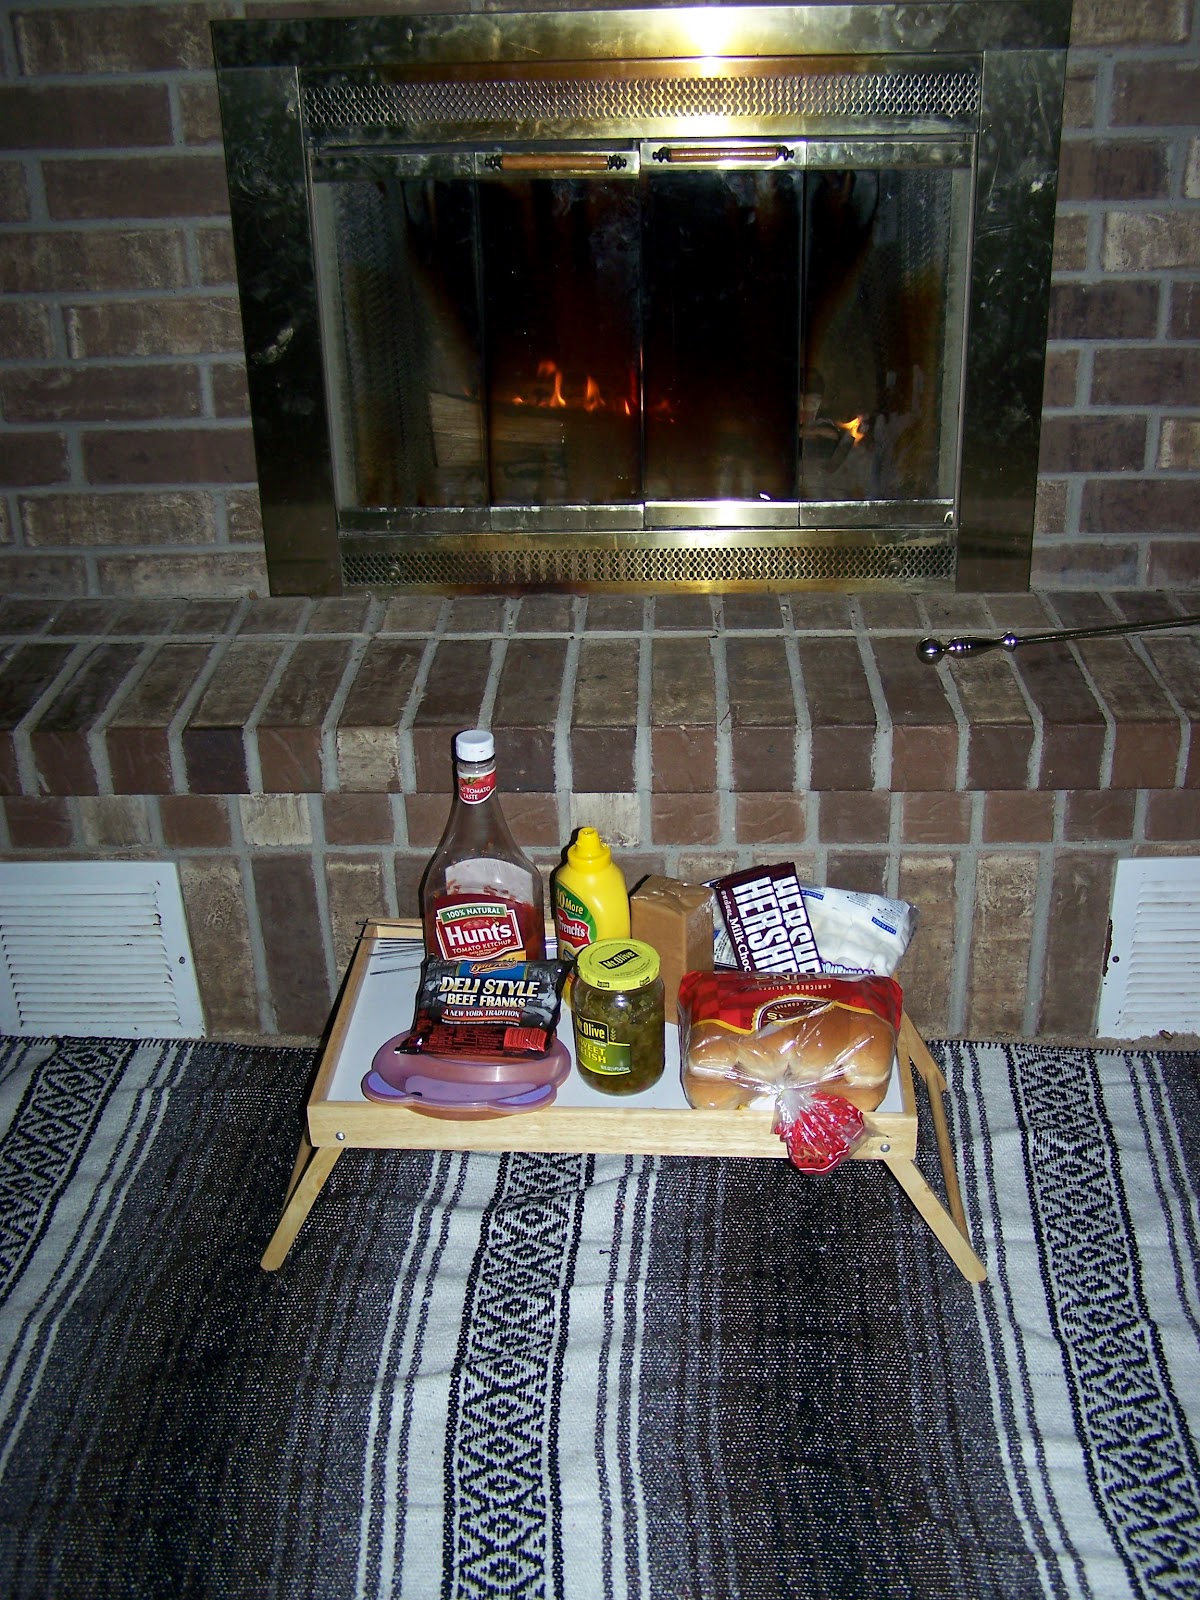
4. Use your wonderful fireplace as your campfire.  If you don't have a fireplace, you could use a burner on your stove if you have a gas  stove, if you have no gas stove, you could use your microwave and just pretend. Roast your hot dogs, make s'mores and don't forget to sing a few camp songs.


5.  Last but not least, you should play a game or two, use a flashlight and if your kids are old  enough, tell spooky stories.  We played Go Fish in front of the fire, then changed into our pajamas and climbed into our tent to read a book by flashlight.

I guess there is technically another step.

6.  Marvel at your awesomeness as you watch your kids faces light up with joy when you set everything up.  Be amazed that they like it so much they continually talk about their camp out for the next week, ask to sleep in their tent every night and want to make every dinner in the fireplace.  Smile  at your husband as you both realize you have just made one of those amazing memories for them that they will cherish even as adults.

Thursday, February 16, 2012

Updating Picture Frames

Wow!  I can't believe it has been 2 weeks since I made a post.  The really sad part is that I have made note of several things to make posts about, I just haven't gotten around to actually making the posts.  Oh well, I guess I will just jump in and start.
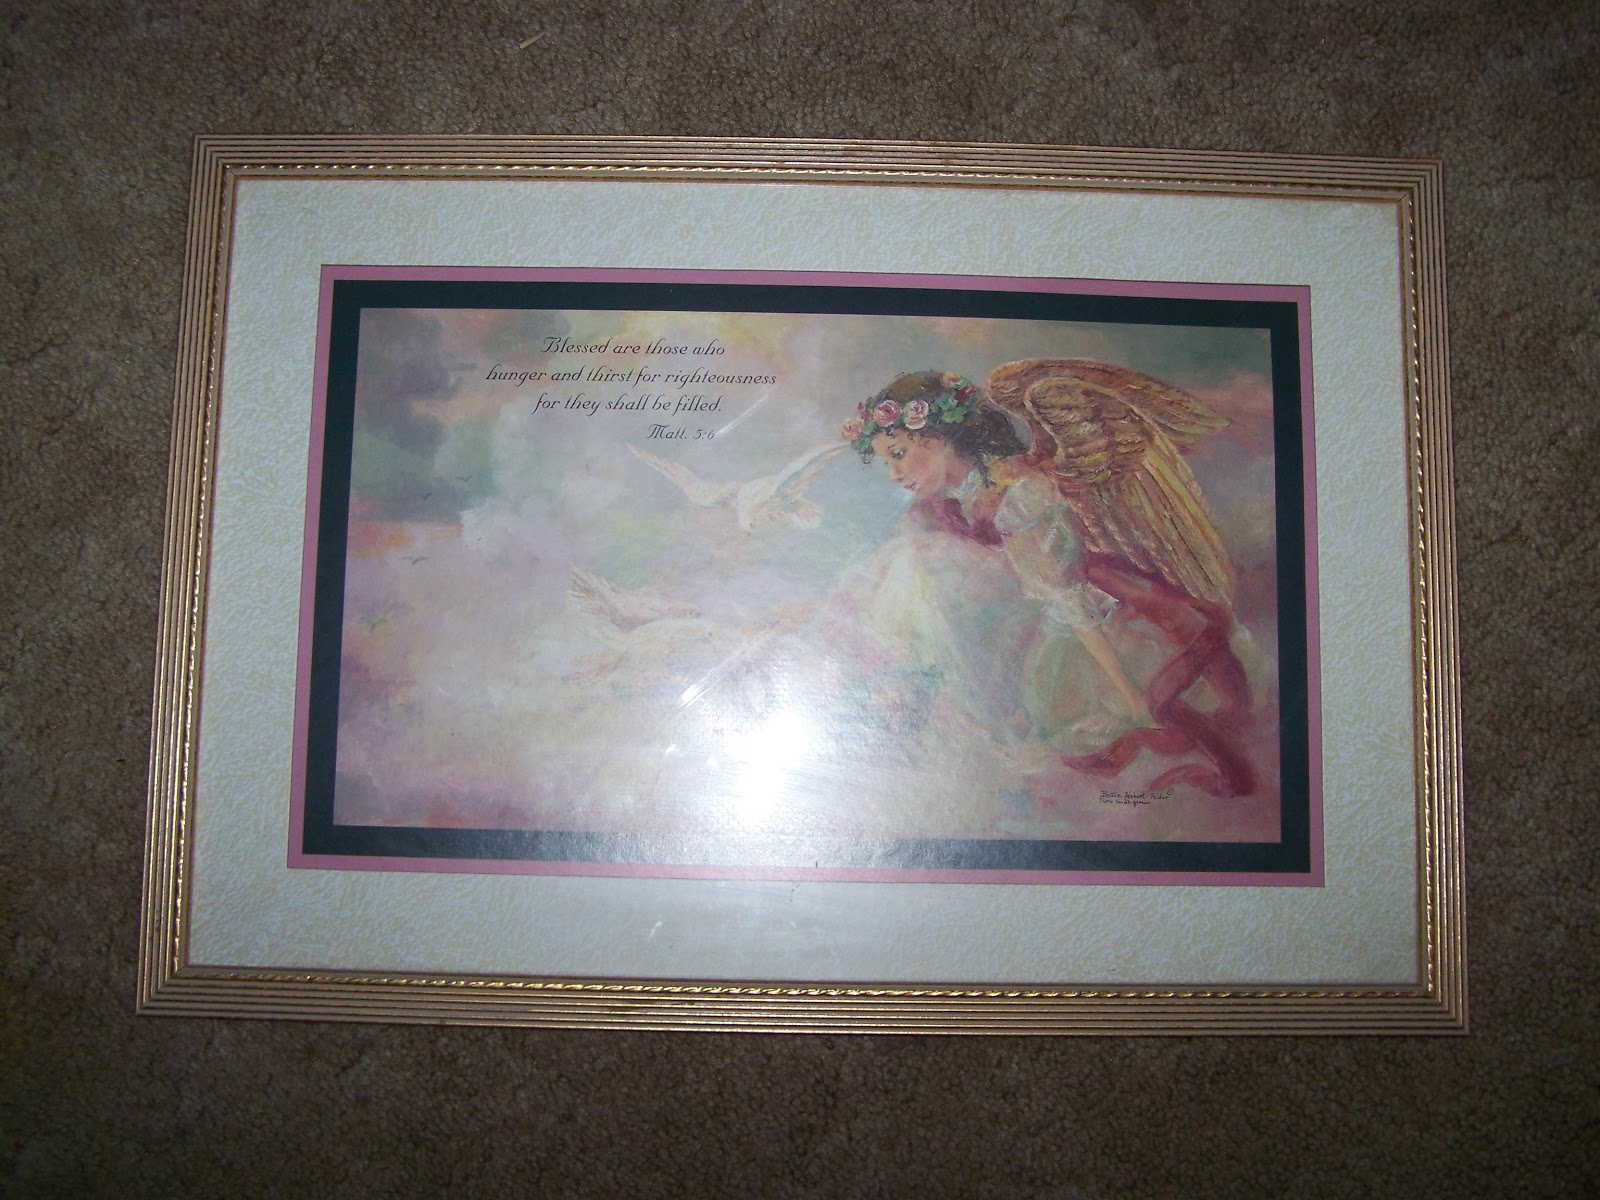
I recently came across 2 prints I saved from my childhood.  They are really beautiful but the frames were horribly dated. 

I forgot to take a picture of the other one before fixing

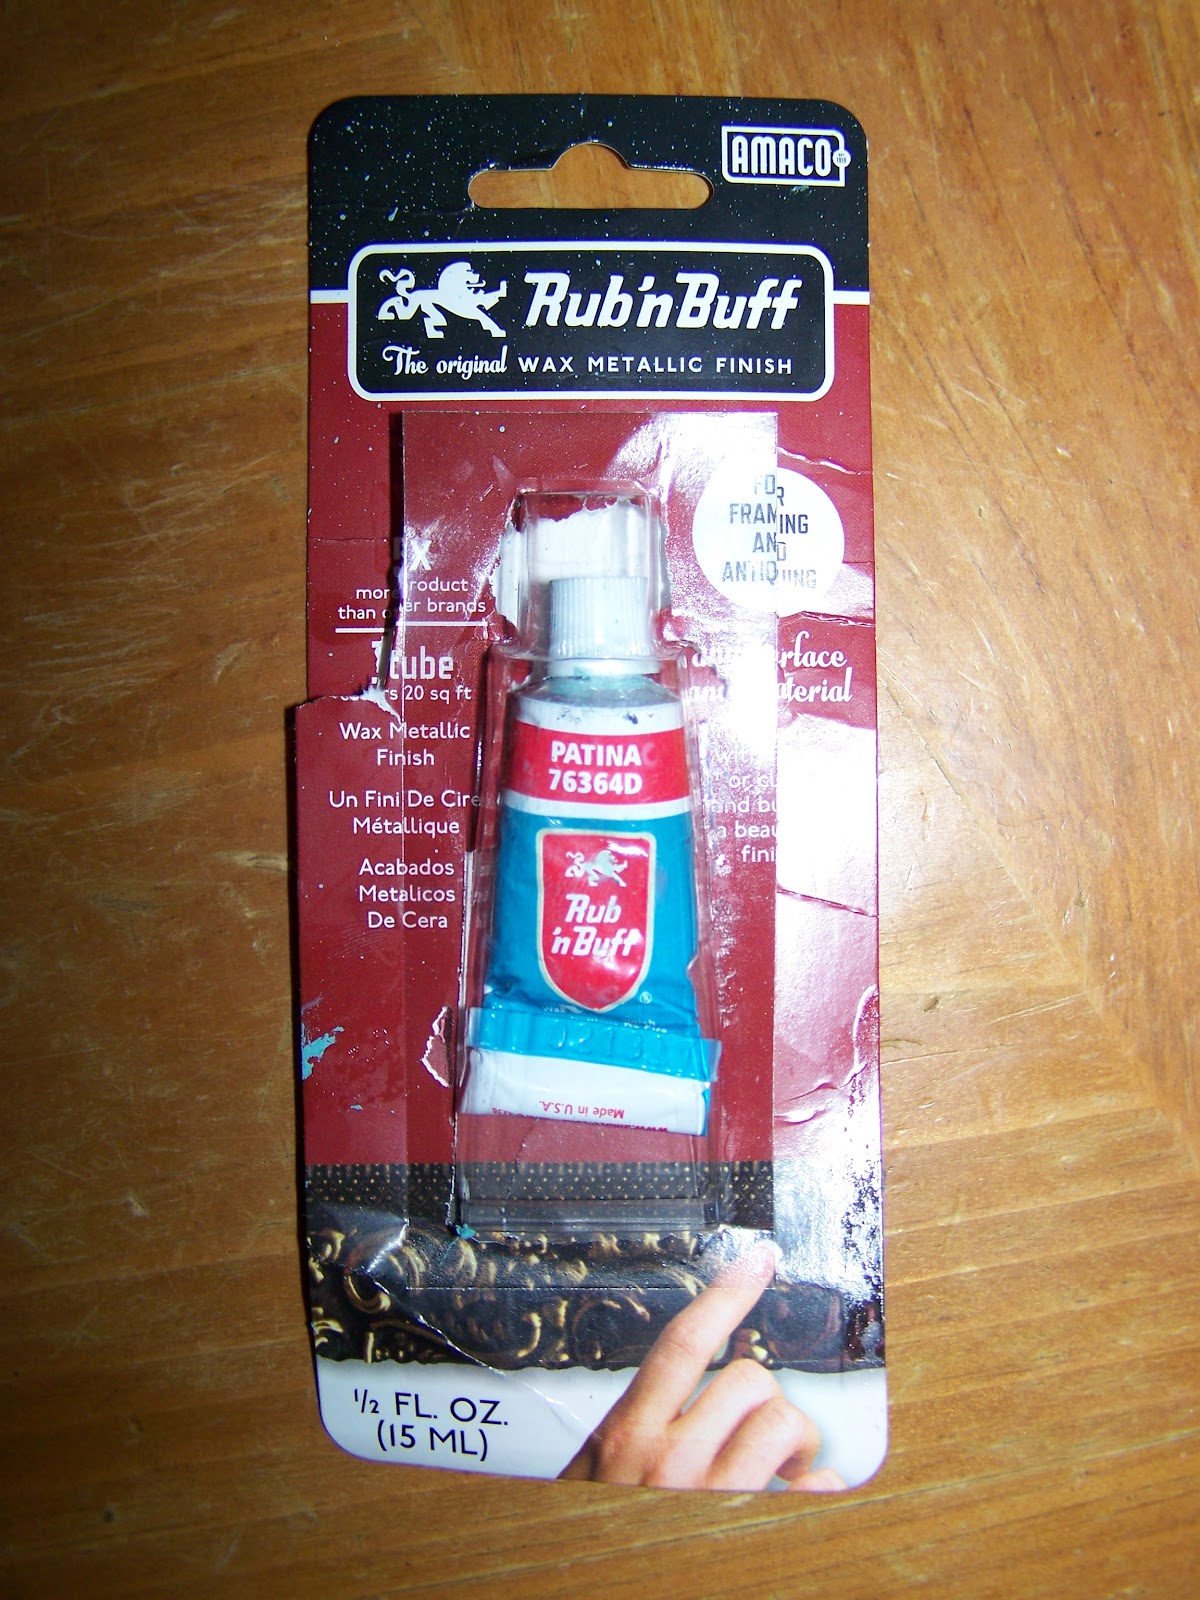
In December when I was  making Christmas presents, I bought some Rub n Buff but I didn't realize how bright it would be.  I ended up not using it for that project and I have been trying to find something to make with it since.


Well, how perfect!  My older two girls share a room and it is decorated in bright colors like pinks, oranges and bright blues.


Here are both prints.


Not only do the blue frames go perfectly with my daughters' room, it also really makes the prints pop.
A great solution to updating the look of a room without spending a lot of money.  You could also spray paint a frame but I wanted to use the Rub n Buff so some of the gold would shine through and the frames would  have more depth than if they were all one solid color.

Tuesday, January 31, 2012

Hero

I think everyone should have a hero, someone they look up to and admire, someone they can turn to for guidance, someone they actually KNOW, not someone famous.  In regards to that, I have to tell you, I think I have discovered who my monster's hero is, at least for the moment. 
Today, our television quit working and the first thing my 2 year old said was, "Maybe Papa can fix it!"  (Papa is my dad, her grandfather)  A few weeks ago she pulled a drawer out too far and it fell off the tracks, her response?  "Uh oh, Papa needs to come fix it!" 
The best one though is that her birthday is in a few months and when I asked her what kind of party she wanted for her birthday, she immediately responded with "A princess party!!!" and then followed that up almost immediately with "and Papa has to dress like a prince!!"
You don't think she likes her Papa do you? 
Of course, if I had to name just one person as my hero, it would be my father as well.  He is the kindest, most generous, most selfless person I know.  He is always giving to others, hence becoming a police officer.  He lives to protect and serve, and not just in a professional sense but truly in a personal sense as well.  He uses his time off to help me and my brother remodel our houses, or help mow an elderly person's lawn or construct a handicap ramp for someone's home.  He takes vacation time every year to go with a group called Church Builders of Texas to build a church.  If you call him and need help, he will be there at the drop of a hat and not just with his family, but with anyone he knows.  Please don't take this to mean he is flawless.  He is human of course and he makes many mistakes, just like all of us do, but I don't think I have ever seen my dad do anything malicious or cold hearted, he always strives to be a good, Godly man.  So to my dad, should you ever discover my blog, thank you for being my hero, the person I look up to and admire, the person I strive to become more like every day. 
I love you Dad!

Saturday, January 14, 2012

Meatballs

I invited my mother over for dinner tonight since my father was out of town.  When I have guests over for dinner, I like to try something different to impress them and since it is my mother, the one who taught me a lot of the recipes I know, I can't fall back on an old standby.  So I created something new and it was a big hit with everyone. 


Here is my recipe for meatballs, and  I will apologize in advance since I don't measure out ingredients when I am cooking.


Ground beef
1 packet Lipton onion soup mix
Worcestershire sauce

milk
beef bouillon granules
corn starch
salt and pepper to taste

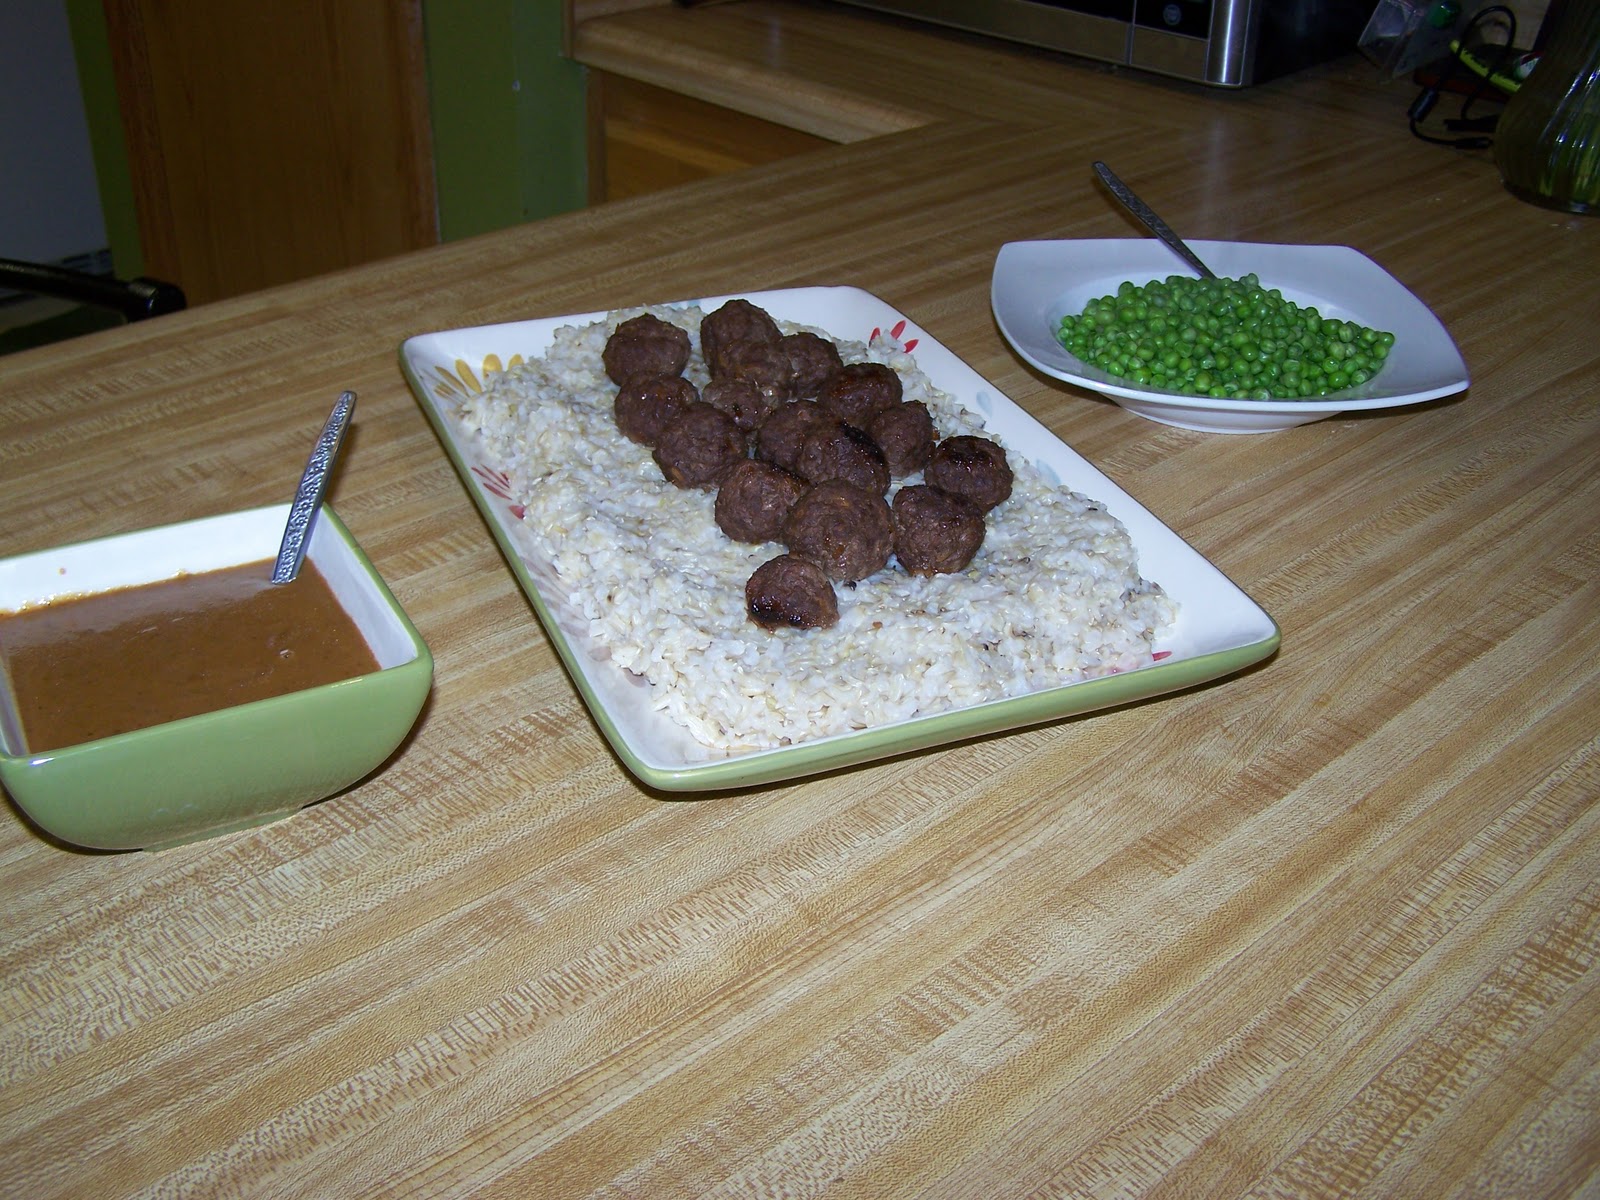
I mixed my ground beef with a packet of onion soup mix and  some worcestershire sauce and made meatballs with it.  I sprayed my saute pan with some cooking spray and browned my meatballs on all sides.  I also started some brown rice cooking.  When my meatballs had been browned  on all sides, I covered the pan, occasionally stirring them, and let them cook until finished.  I took my meatballs out of the pan and set them aside, then I drained all but about 2 TB of drippings from the pan.  I used the beef bouillon granules dissolved into water (because I didn't have any beef broth on hand) and, leaving the heat on in the pan, used the makeshift beef broth to deglaze the pan.  I then added some milk, some more worcestershire sauce and some corn starch to thicken up while stirring constantly ro make the gravy.  I used salt and pepper to taste.  These meatballs were served over a bed of brown rice with the gravy and steamed peas on the side.  Yummy!  The only bad part was there are almost no leftovers!